
Let’s deep dive into how to care for air plants in an indoor environment. You’re in for a botanical journey unlike any other as these almost ethereal plants seem to defy the norms of typical gardening.
Caring for air plants is relatively easy, however, these ‘low maintenance’ mystical plants still crave some TLC, just like any other member of your green family.
So, how often do you actually ‘water’ something that doesn’t grow in soil? And what’s the deal with these often rootless plants, how do they take in nutrients?
Let’s untangle the mysteries of air plant care together. By the time we’re done, you’ll be an expert air plant whisperer ready to give them the best life imaginable.
Basic Air Plant Care Tips
From adequate lighting to their preferred watering schedule, there’s a lot to learn about these finicky plants if you want them to bloom and thrive.
Ideal Lighting Conditions for Healthy Air Plants
Lighting is super important for happy air plants. They thrive in bright, indirect light so the ideal location is near a window with filtered sunlight. A net or sheer curtain can help to diffuse the light. Most importantly avoid direct sunlight, since it can cause overheating and scorched or damaged leaves.
If you live in a warm climate and keep your plants outdoors, one to two hours of direct sunlight early morning is fine, but as the sun gets stronger your plants will need shade or filtered light.
Indoor and outdoor lighting tips:
- Indoors: Keep your plants near a window with bright, indirect sunlight or under filtered artificial lighting if you do not have a suitable window.
- Outdoors: Keep your plants in a shaded area with bright ambient light – no direct sunlight unless it’s a few hours early morning.
Air Plant Watering Techniques and Humidity
Watering air plants is very different from watering typical houseplants. Partly because air plants kept in an indoor environment usually require soaking and partly due to the length of time between watering.
You should soak your air plants in a bowl or bucket of water once a week for 20-30 minutes. This is typical of most air plant species, however, some species prefer misting 2-3 times a week instead – more on this below.
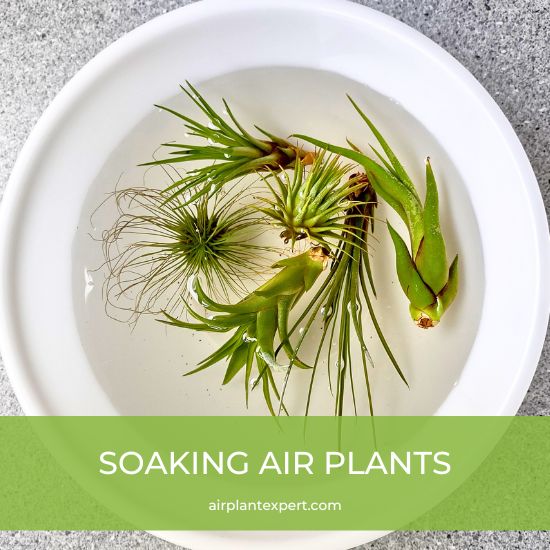
After soaking, gently shake off any excess water and place them upside down to let them air dry. This drying technique helps to avoid rotting.
Tillandsia love rainwater, just as nature intended, so if you have space a water butt may come in handy. I use pond water to soak my air plants. This provides adequate hydration as well as the nutrients the plants need to flourish. You can use soft tap water, no problem, just bear in mind that tap water does not provide adequate nutrients so you’ll need to take care of that separately.
If you want to get scientific, air plants prefer slightly acidic water with a pH of 5.5 to 6.0.
If you’re using tap water, one important point to remember is to let the water sit for over 24 hours to allow the chlorine to evaporate. Don’t skip this step as the chlorine will ultimately harm your air plants.
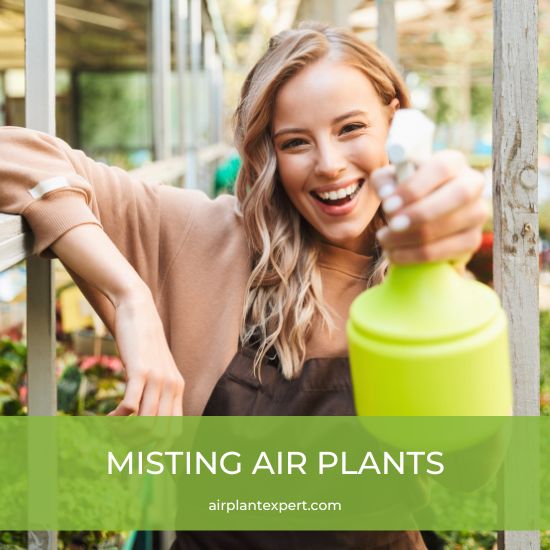
The ideal humidity level for most species of air plant is between 50-70% so keeping them in a bathroom or misting them occasionally will help to keep them healthy. I keep several species on my kitchen window sill and they’re thriving – I eat a lot of pasta so the kitchen does get very steamy.
Air plants require higher humidity levels than most traditional indoor plants. To further increase humidity levels you can place a tray of water near your air plants or use a humidifier.
Alternatively, mist your plants regularly, every 2-3 days.
It’s important to note that air plants should not be placed in excessively humid environments as this can cause rot.
Air Circulation
Air plants need good air flow/circulation so closed-door rooms or stagnant corners with stale air are not good locations to keep Tillandsia. They do not like cold drafts so bear that in mind, but placing them near a window that you open from time to time will help to keep your green buddies healthy.
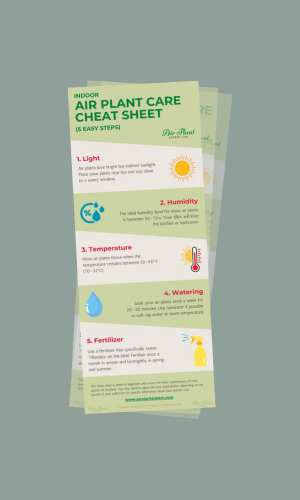
Get Your FREE Air Plant Care Cheat Sheet
5 easy steps to keep your air plants happy and healthy.
Providing Nutrients and Fertilizers
Air plants absorb nutrients from the atmosphere but not in sufficient quantities when kept indoors. There aren’t enough nutrients floating around, and it never rains.
Air plants do not require frequent fertilizing, but they do benefit from occasional feeding. A balanced, water-soluble fertilizer can be used once a month during the dormant autumn and winter seasons, and fortnightly during the growing spring and summer seasons.
Be sure to follow the manufacturer’s instructions for mixing and application.
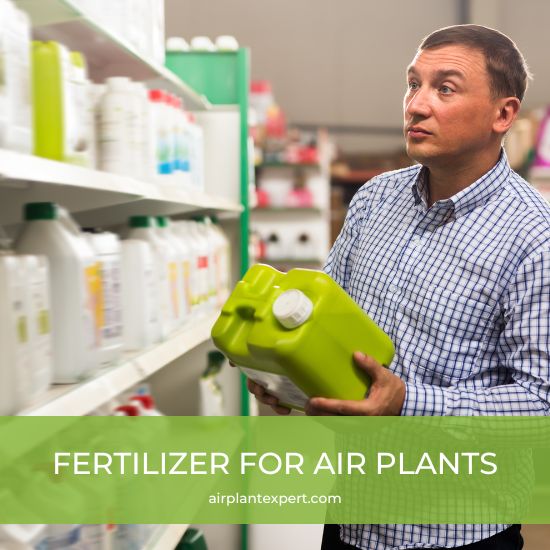
Air plants are very sensitive to over-fertilization so it’s important to fertilize sparingly. Use a water-soluble fertilizer specifically designed for air plants (or bromeliads) and dilute it to 1/4 strength.
Alternatively, use a pre-mixed Tillandsia fertilizer, purchased in a spray bottle, for easy maintenance.
Proper Temperature for Air Plants
The majority of air plants thrive when the temperature around them remains between 50-90°F (10-32°C) so indoor environments are often fine for growing Tillandsia. However, you’ll need to consider more than just the temperature of your home to keep your plants happy.
Air plants should be kept away from drafty windows and doors, or frosty gardens if you keep them outside. They don’t like cold drafts and temperatures below 40°F for more than several days will likely harm them.
Propagating Air Plants
Understanding Air Plant Propagation
Air plants can be propagated by seed or by dividing pups/offsets from the mother plant. The latter option is the most common and easiest form of propagation and is just as exciting as growing new plants from seeds.
When the mother plant produces pups or offsets after blooming you can carefully remove them and grow the new plants/clones separately, ensuring more little bundles of green joy.
You can see two new pups growing from the base of this air plant …
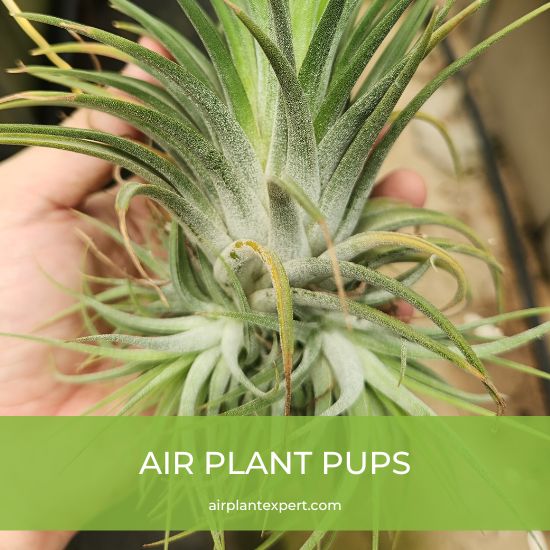
I wait until the pups are roughly a third of the size of the mother plant before removing them as this gives them a better chance of survival.
Before removing the pups I like to soak the mother plant for a few hours so they are in the best condition and rehydrated.
To remove the pups gently twist and pull them away from the mother plant. Use a sharp knife or a pair of scissors if need be, but keep your fingers out of harm’s way.
Caring for Your Air Plant Pups
Air plant pups are relatively easy to care for. Once removed, allow the pups to sit for a few days so the area where the plants were separated can dry and callus over. Then care for your new plants in the same way as you care for parent plants.
Having said that, I like to mist the newly separated pups 3-4 times a week during their first 2 weeks of freedom just to give them a bit of TLC.
Displaying Air Plants
Creating Air Plant Displays
Although displaying air plants is not strictly care related many people do ask how best to plant, position, or locate their Tillandsia. There are so many creative ways to display air plants and accentuate their unique beauty.

Here are some options to consider:
- Hanging displays: Suspend your air plants using wires, ropes, or even inside glass terrariums. Air plants love hanging around.
- Sit them on a shelf: That’s right, just place your air plants directly on a shelf, sill, or table to create an ethereal touch in your home.
- Coral reef inspiration: Explore the combination of air plants and coral-like elements and shells for a captivating display.
- Cups, vases, and objects: Air plants will grow in or on just about any object in your home, so be creative, you’ll be amazed.
- Driftwood: Mount your air plants on driftwood for a natural or beachy vibe. This offers a great opportunity to mix and match multiple air plant species or even add other elements like moss or seashells to create a dynamic display.
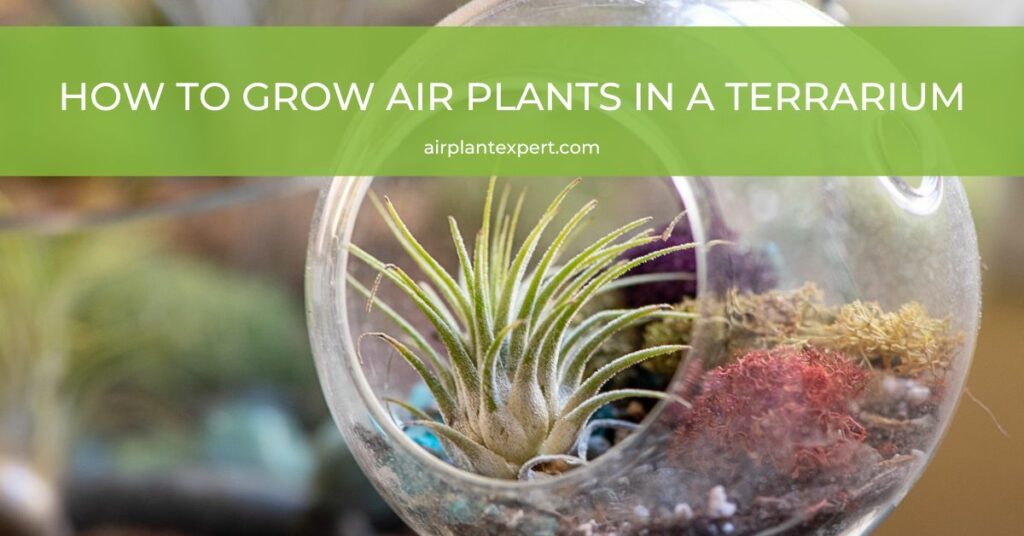
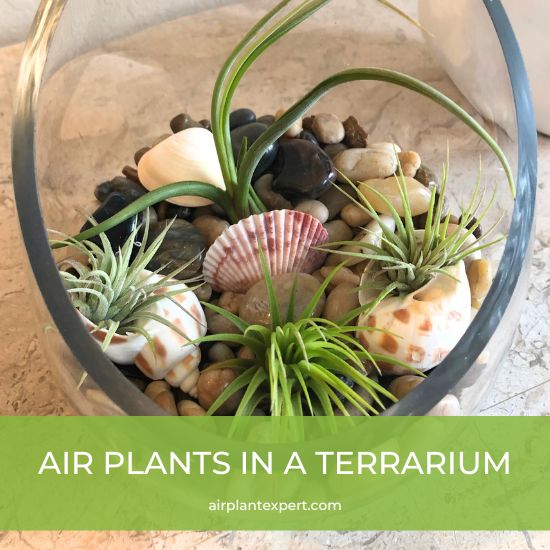
Using Terrariums and Containers for Air Plants
Air plant enthusiasts often display their Tillandsia in terrariums or non-conventional containers. Terrariums come in all kinds of shapes and sizes and can spotlight your choice of air plants.
Here are a few options to consider:
- Glass terrariums: Place your air plants in a glass terrarium with a small opening for airflow. Fill it with pebbles, sand, or other decorative elements to create a striking environment that complements your plant’s beauty.
- Pots, pans, household junk: you can use practically anything to accentuate your air plant displays from glass objects to clay and ceramic containers, the choices are endless as these soilless wonders can grow almost anywhere.
Caring for Special Types of Air Plants
When it comes to caring for air plants it’s essential to understand the differences among various types to ensure they thrive. There are two broad categories of air plants: mesic and xeric, which have different light and watering needs. Some people like to refer to these two categories of air plants as fuzzy and smooth air plants. 🙂
Caring for Mesic and Xeric Air Plants
Mesic air plants typically grow in environments with plenty of rain and/or mist such as cloud forests, while xeric air plants are found in drier areas such as desert-like regions. As a result, their care requirements differ.
Mesic air plants generally need more frequent watering since they are accustomed to humid surroundings. To care for your mesic air plants soak them in water for 20-30 minutes once a week. Regular misting is also beneficial for these types of plants.
Mesic air plants prefer bright, indirect light and can tolerate some direct sun as long as it’s not too intense and only for a few hours early morning. They can be grown indoors near a window or outside in a shaded area with filtered light.
Mesic Tillandsia are sometimes called smooth air plants, such as these beautiful Tillandsia Ionantha Rubras.

These plants have smoother foliage and fewer visible trichomes and therefore usually greener in appearance. As a result, smooth air plants typically need more frequent hydration.
Xeric air plants are native to arid environments and can tolerate drier conditions than mesic air plants. They prefer more direct light and some species can grow in full sun.
Xeric air plants require less frequent watering/soaking, roughly every 7-14 days depending on how dry the air is in your home. Some xeric species only need misting so it’s a good idea to try and identify which species you own. They should be misted with water 2-3 times a week instead of the weekly soak that mesic types prefer.
Xeric air plants are sometimes called fuzzy air plants, such as Tillandsia Tectorum …
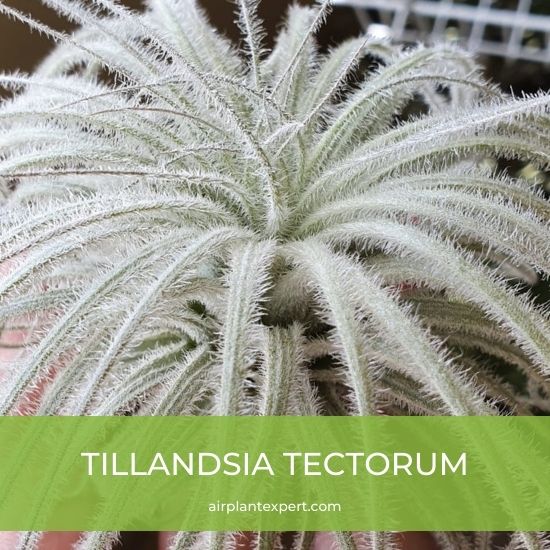
These plants often have a ‘fuzzy’ appearance thanks to the presence of visible trichomes on their leaves. The abundance of trichomes helps with water and nutrient absorption, which means fuzzy air plants can handle less watering. However, they may sometimes still need soaking when kept in an indoor environment.
General care for Mesic and Xeric Tillandsia
Regardless of which types or species of air plants you care for be sure to allow them to dry sufficiently after watering them. Air plants are prone to rotting if excess water gets trapped between their leaves or left in pooling water.
Give your plants a gentle shake after watering, and leave large plants upside down to dry for 3-4 hours. That helps excess water to drain away and avoid rotting.
In summary, mesic air plants need more moisture and prefer indirect light, while xeric air plants can tolerate drier conditions and prefer more direct light. It’s important to understand the specific needs of your air plants to keep them healthy and thriving.
Troubleshooting Common Air Plant Issues
Caring for your air plants isn’t only about giving them bright, indirect light and proper watering. Like people, your Tillandsia will sometimes need a bit of extra TLC to get them into tip-top shape.
Identifying and Treating Air Plant Diseases
One of the main issues you might face with air plants is rotting, which usually results from overwatering or excess moisture. Rotting can encourage disease so you’ll need to act quickly.
Alternatively, if you notice browning leaf tips or dead leaves on your plants, it could be due to inadequate watering or disease. If it’s a simple case of dehydration your air plants can recover by increasing the soaking frequency and duration.
However, if the damage seems more severe or widespread you may need to isolate the affected plants as they may be rotting and/or diseased.
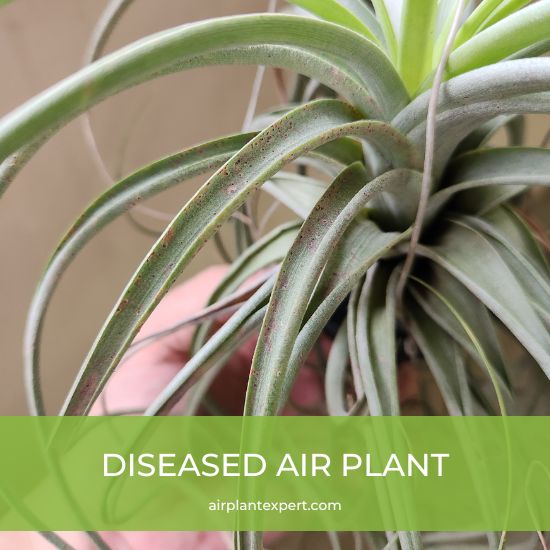
Diseases often appear in the form of black, white, yellow, or orange slime or brown spotting on the plant’s leaves and will require a suitable remedy or fungicide. Use a mild fungicide if you notice any odd-looking slimy substances growing on your air plants.
Make sure the fungicide does not contain copper as that will harm your plants.
Rotting leaves and roots should be removed immediately and the plant left to dry for a few days.
Dealing with Burn and Dehydration Issues
Providing your air plants with the right amount of light is crucial for their overall health. Too much sunlight can cause burns whilst insufficient light can lead to slow growth or even decline. Finding a sweet spot for your plants in bright, indirect light such as near a window or a few feet back should be ideal.
Burnt or dehydrated air plants will require some extra care. If the plant is burnt or the leaf tips are browning you should trim the damaged parts and move the plant to a shadier location. An extra long soak will also help to revive the plant.
For dehydration issues, increase the watering frequency and avoid placing your air plants too close to heat sources like very sunny windows, fireplaces, or radiators as this can exacerbate the issue by drying them out even further. Severely dehydrated air plants can be left to soak overnight to help aid their recovery.
Overwatering Issues
Overwatered air plants usually deteriorate quite quickly. Obvious signs of overwatering include black mushy roots, rot at the base of the plant, and black sludgy areas towards the base of the plant’s leaves.
You should remove the rotting leaves and roots immediately to prevent diseases from forming and place your plants in an area with good air circulation to help the infected areas dry.
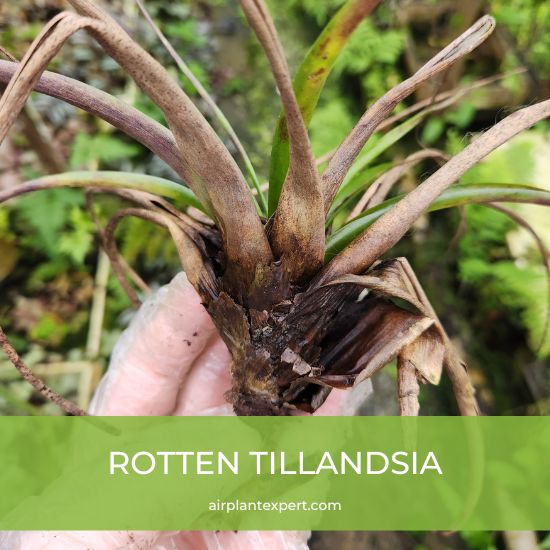
Wilting and yellowing leaves can be an early sign of over-watering but don’t confuse that with over-fertilization, which I cover next.
Fertilizer Burn
As I said above wilting and yellowing leaves can be a sign of over-watering but also over-fertilization. If your fertilizer mix is too strong or given too frequently it will damage your air plants and cause fertilizer burn. This can appear in many ways but a severe case will result in black spotting or large areas of black or brown patches on your plant’s leaves.
Be sure to follow the watering and fertilizing guidelines outlined in this article to avoid this issue.
Happy Growing …
Air plants are a unique and low-maintenance option for indoor gardening. With proper care, they can thrive and add a unique touch of greenery to your home.
Remember to provide bright, indirect light, proper watering and humidity, and occasional fertilization. With the right care, your air plants will continue to thrive for many years.