Although air plants are known for their low-maintenance nature and ability to thrive in a variety of environments they can still experience problems such as overwatering, dehydration, and wilting, especially if they’re neglected.
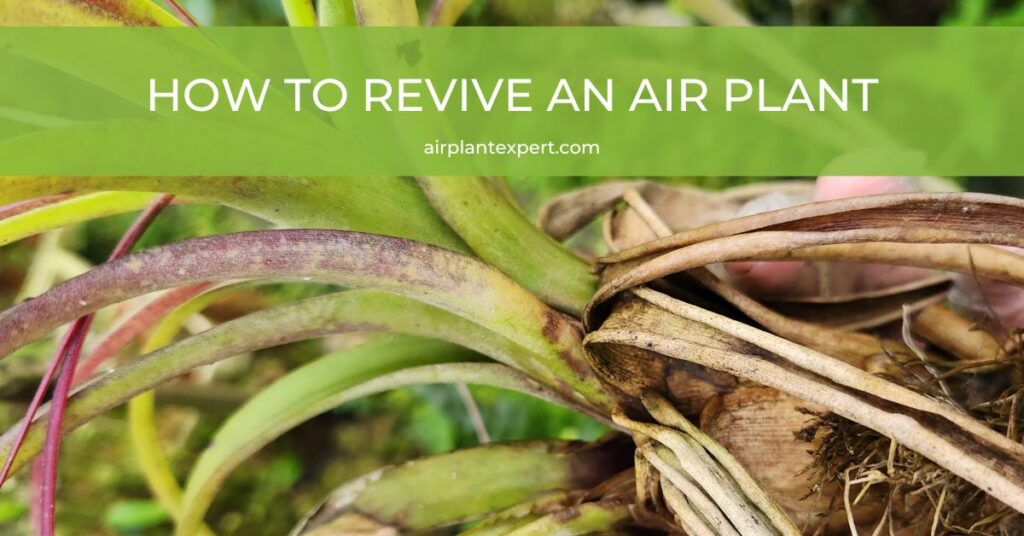
Reviving an air plant may seem like a daunting task but with the right knowledge and a few simple steps you can breathe life back into your beloved green companion. Proper watering, ensuring adequate sunlight, and maintaining proper air circulation are just a few key aspects of air plant care that will be covered in this guide.
Read on for helpful tips and tricks on restoring your air plant to its former glory, and making your indoor green space more vibrant and healthy.
- Learn the Signs of a Dying Air Plant to Help With Revival
- Step-by-Step Guide on How to Revive an Air Plant
- Frequently Asked Questions
- What are the signs of a dehydrated air plant?
- How can I properly water my air plant to avoid drooping?
- What causes an air plant to turn black at the base?
- Which type of fertilizer is best for air plant care?
- Is it possible to bring a rotting air plant back to life?
- Will air plant leaves grow back after damage or removal?
Learn the Signs of a Dying Air Plant to Help With Revival
Brown Leaves
One of the most common signs of a dying air plant is brown leaves. This could be due to dehydration, under-watering, or too much sunlight and heat. Brown leaves could indicate that your air plant is not receiving enough moisture or is overly exposed to the sun.
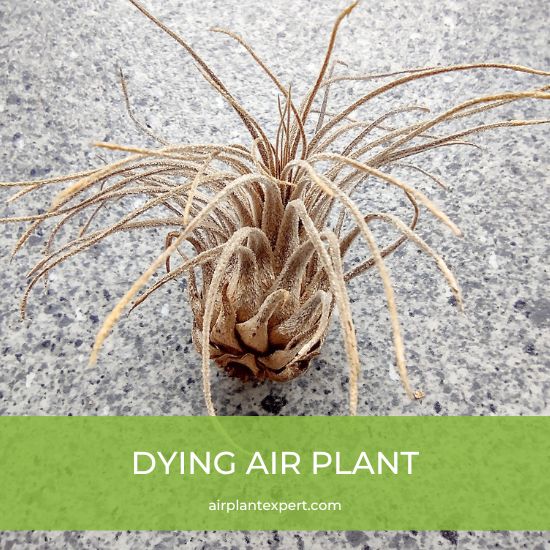
To address these issues ensure proper watering and placement in bright, indirect sunlight. Another reason for browning leaves could be low humidity. Tillandsias love a humidity level of around 50-70%.
Floppy and Limp Leaves
Air plants can become floppy and limp when they are not properly cared for. Symptoms like these are often a sign of under-watering or poor humidity. In this case, you should adjust your watering schedule and try to improve the humidity around your plants by setting them on or close to a tray of water, using a humidifier, or regularly misting them.
Leaf and Root Rot
Rotting leaves or roots is another sign that your air plant is in trouble. This condition is typically caused by overwatering and poor ventilation. It’s crucial to maintain the right watering regime for your air plants and make sure they dry properly after each watering.
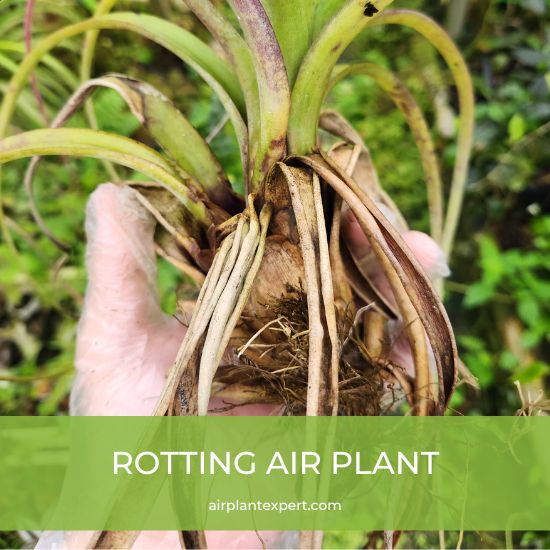
If your Tillandsia suffers from root or leaf rot you may need to trim off the affected parts immediately and adjust its care routine. Rotting leaves and roots appear dark brown or black and mushy.
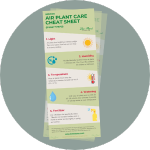
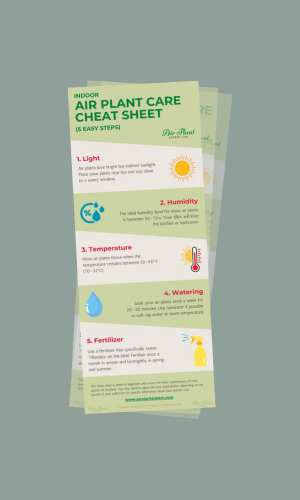
Get Your FREE Air Plant Care Cheat Sheet
5 easy steps to keep your air plants happy and healthy.
Infestations
Pests such as mealybugs can also damage your air plants. Infestations may cause your plants to wither or disintegrate. If you find pests on your air plants take immediate action to remove them.
Use a soft brush or cotton swab dipped in rubbing alcohol to remove these pests gently. Always ensure proper care of your air plants to minimize the risk of future infestations.
Step-by-Step Guide on How to Revive an Air Plant
First, you need to establish if you have underwatered or overwatered your air plant, or if something else is wrong. Use the information above to establish what the problem is and then follow the step-by-step process below to revive your air plant.
1. Removing Dead Leaves and Roots
Carefully examine your air plant and look for dead or dying leaves and roots. Gently remove them – this is important as dead or dying leaves can inhibit new growth and encourage diseases – make sure you also check the roots for any signs of rot.
2. Rehydration Process – skip this step if you have overwatered your plant
Next, you’ll need to rehydrate your air plant. Fill a bowl or suitable container with rainwater or soft tap water. Tap water must be left to stand for at least 24 hours so harmful chemicals like chlorine can evaporate. Fully submerge your air plant into the water.
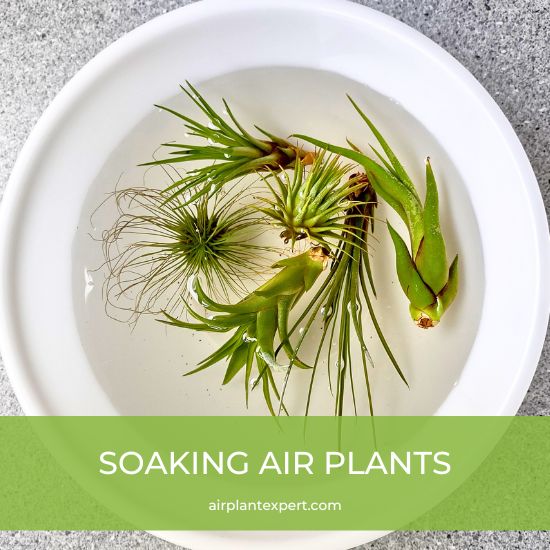
Allow it to soak for an extended period (3-4 hours), even overnight, to ensure thorough rehydration. After soaking gently shake off any excess water before moving on to Step 3.
3. Provide Adequate Light and Air Circulation
Whether your plant has been underwatered, overwatered, or otherwise, it now requires access to proper lighting. Air plants thrive in bright, indirect sunlight so you’ll need to find a suitable location. Also, ensure the plant gets adequate air circulation to prevent rot and promote healthy growth.
Tillandsias do not like cold drafts. However, warm air movement created by an open window or door will help.
4. Reintroducing Nutrients
After 7-10 days, it’s time to give your plant some nutrients/fertilizer to help it fully recover. The best fertilizer for air plants is one that states ‘Tillandsia’ on the label and has a PH value between 5.5 and 6 alkalinity. Follow the package directions to apply the fertilizer correctly.
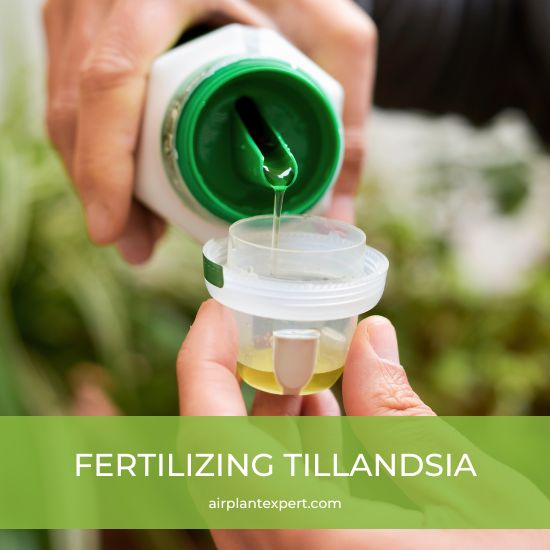
Typically, one or two sprays are all they need – once a month when the plant is dormant during the winter and fortnightly during the summer. I often use pond water to water my air plants as it contains all the nutrients they need to thrive.
5. Preventing Future Issues
Ensuring proper care is crucial to preventing future problems with your air plants. Here are a few key points to keep in mind:
- Consistently provide adequate light and air circulation
- Water your air plant regularly, but avoid overwatering
- Remove dead leaves and regularly check for pests and rot
- Apply Tillandsia fertilizer as directed for optimal nutrient intake.
After following these steps, you’ll soon see your air plant flourish and regain its vigor.
Frequently Asked Questions
What are the signs of a dehydrated air plant?
A dehydrated air plant may exhibit symptoms such as curling leaves, or wrinkling, followed by the leaves turning brown and crispy. On narrow-leaved species, the leaf tips usually turn brown first.
If you notice these signs it’s likely your air plant isn’t getting enough water.
How can I properly water my air plant to avoid drooping?
To properly water your air plant submerge it in water for 20-30 minutes once a week. After soaking, shake off excess water and place it back in its preferred location with plenty of air circulation. You should note that some species may prefer misting instead of soaking.

These species belong to the xeric types of Tillandsia and are often whiter in appearance due to an abundance of trichomes on their leaves. They prefer misting 2-3 times a week.
What causes an air plant to turn black at the base?
If your air plant has a black base, it is probably an early sign of rot. Rotting is usually a result of overwatering or poor drainage. Fortunately, you may be able to revive your air plant.
Remove the damaged leaves and roots and allow the plant to dry completely before resuming a more moderate watering schedule.
Which type of fertilizer is best for air plant care?
I’ve come to the conclusion the best NPK values for Tillandsia are 17-8-22. You can apply the fertilizer by diluting it with water and then misting or soaking your plants once a month when dormant or fortnightly when growing.
However, the easiest way is to purchase a ready-mixed Tillandsia fertilizer that specifically states ‘Tillandsia’ on the label and has a PH value between 5.5 and 6 alkalinity.
I recommend you avoid using regular houseplant fertilizer as it likely has a different nutrient balance and will burn your plants.
Is it possible to bring a rotting air plant back to life?
In some cases, it is possible to revive a rotting air plant. Trim away the rotting areas with a pair of scissors or a knife. Then, let the plant dry for 7-10 days and follow my step-by-step guide above. Keep a close eye on the plant and be patient, the recovery process can be slow.
If the entire base of your air plant has turned into a black mushy substance it is unlikely the plant will survive.
Will air plant leaves grow back after damage or removal?
While air plant leaves do not regenerate once they are removed or damaged, the good news is that your plant will continue to grow and produce new leaves. Additionally, air plants can produce offsets/pups, which are baby plants that grow from the mother plant.
The pups can be removed carefully and grown as separate plants. This is a great way of increasing your Tillandsia collection.